Creating a piece of glass art is not just about skill; it’s about unlocking your creativity and expressing your unique vision. Glass, with its shimmering translucence and vibrant colours, offers endless possibilities for artistic expression. Whether you're a novice or have some experience, this guide will provide you with the essential steps to craft your own stunning glass art piece.
Understanding the basics
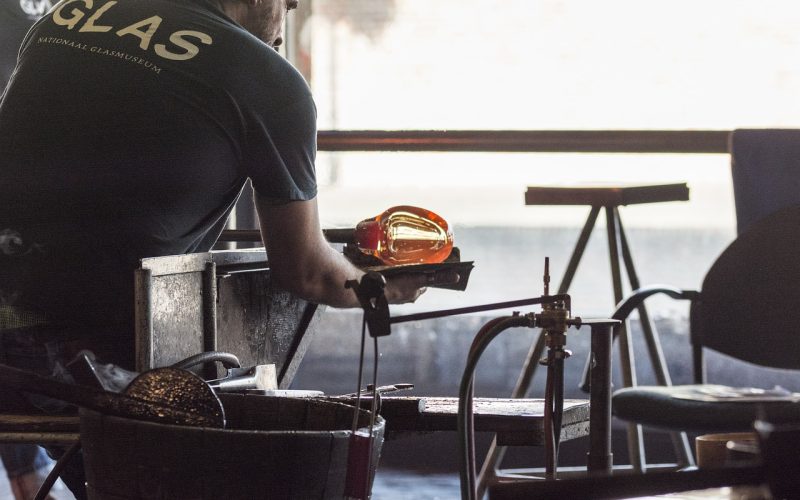
Before you begin, it’s important to familiarise yourself with the basics of glass art. There are various techniques, such as stained glass, fused glass, and glass blowing. Each method involves a different approach and set of tools. Stained glass, for instance, requires cutting pieces of coloured glass and assembling them with lead came or copper foil. Fused glass involves layering glass pieces and heating them in a kiln until they fuse together. Glass blowing, on the other hand, involves inflating molten glass into a bubble to form different shapes. Choose a technique that resonates with you and aligns with the tools you have access to.
Gathering your materials
Once you’ve decided on a technique, it’s time to gather your materials. If you’re working on stained glass, you’ll need coloured glass sheets, a glass cutter, a soldering iron, and lead came or copper foil. For fused glass, you’ll need a kiln, glass sheets, frit (crushed glass), and moulds. In glass blowing, the primary materials include molten glass, a blowpipe, and various shaping tools. Safety equipment is also essential across all techniques, including goggles and gloves, to protect against sharp edges and high temperatures.
Designing your piece
Design is a crucial step in glass art creation. Start by sketching out your ideas on paper. Consider the message or emotion you want to convey through your art. Pay attention to colour combinations and how they interact with light. In stained glass, for example, consider how natural light will filter through your piece and enhance the colours. In glass blowing, think about the form and how curves and contours will play into the final look. Don’t be afraid to experiment with abstract designs or unconventional shapes—it’s your vision coming to life.
Preparing your workspace
A well-prepared workspace is key to a successful glass art project. Ensure you have a clean, flat surface to work on. Organise your tools and materials so they are easily accessible. If you’re using a kiln, make sure there’s good ventilation in your workspace to avoid inhaling harmful fumes. Arrange your materials in the order you’ll use them, especially if you’re following a detailed design. This helps maintain focus and efficiency as you work through the creative process.
Executing your design
Now it’s time for the fun part—bringing your design to life. Follow your chosen technique’s process, whether it’s cutting and soldering for stained glass, layering for fused glass, or blowing and shaping for glass blowing. Work carefully and patiently; glass art requires precision and attention to detail. Take your time with each step to ensure accuracy. Remember, mistakes can happen, and they often lead to unexpected and beautiful outcomes.
Finishing touches and display
Once your piece is complete, it’s time to add the finishing touches. Clean your glass to remove any smudges or fingerprints, which can detract from its brilliance. If it’s a stained glass piece, consider framing it to enhance its presentation. For fused or blown glass, think about how you want to display it—on a stand, in a window, or as part of a larger installation. Proper lighting can dramatically enhance the colours and textures of your glass art, so consider its placement carefully.
Creating glass art is a rewarding and fulfilling process that allows you to express your individuality and creativity. Each piece is unique, capturing the light and telling a story in a way no other medium can. With the right materials, a thoughtful design, and careful execution, you can create a stunning work of art that brings joy and inspiration to any space.
